1) Create a new project

2) Right-click Connection controllers and add a Climatix JSON controller

3) Set PIN, Password and Host (IP address or DNS name) as needed in the JSON credentials section.
The PIN needs to be correct, but the Password and Host can be left empty if you wish to enter it in the App later.
4) Set Hub ID in the Inthouse Hub connection settings section.
It can be left empty if you wish to enter it in the App later.
Note – network settings for the Climatix connected to the Hub are in the Hub data sheet https://inthouse.eu/hub
5) In the bottom Datapoints panel click on Import from PLC.
You can import the data points from a live PLC using a USB cable or over network, this uses the Rainbow protocol credentials, same as SCOPE.
If the enabled objects in the PLC can change, it is recommended to first enable them all before the import so you won’t have to do it again in the future if they change and you want to for example add a button for an object that was not visible in the PLC before then.
This can be done in SCOPE, set the data point System > Enabled objects > Enable all, then restart the Climatix and then import the data points from it.
6) Switch the Datapoints panel to the “Recognized” view.

7) Find the objects that you want in the App and drag and drop them from the Datapoints panel to the project tree to some screen (or group).
You can optionally use the “All” dropdown to highlight some object type or the “Find object” on the right.
You can’t drag the parent objects with the circle icon, only those recognized objects inside them.
[R] means read only, [W] means writable.
8) When you then double-click the object that you dropped in the Project tree, you can edit how its button will look like and change its settings.
Usually you will want to change the Object name, Icon and possibly color.
9) You can organize the buttons inside different screens or groups for deeper hierarchy,
Fixed screens are the tabs that you see when you swipe left/right in the App.
Floating screens are essentially pop-up screens that can be opened from a shortcut or menu.
Screens and groups with the List layout option enabled will display their contents similarly than a text HMI as a name/value list and not buttons.
10) You can set global colors in the Project tree -> Design and UI.
https://drive.inthouse.eu/
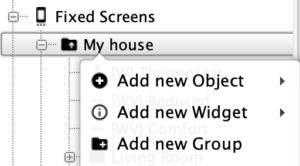
11) Besides the buttons that you drag and drop from the datapoints bottom panel, you can also add objects (buttons), widgets (images and more complex elements) and groups (deeper screen hierarchy) by Right-clicking a screen or group in the project tree:

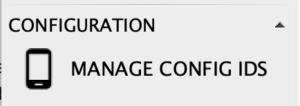
12) When you wish to see the current version in the App, go to Manage Config IDs in the Menu.

Enter your license key and then “Add new” to add a new Inthouse App configuration, or select one from the dropdown and ‘Update” to update an existing one.
Typically you will want to overwrite the connection settings if Studio asks you, and you can optionally choose some Tags to better recognize the Configuration ID in Studio in the future.
Then enter the configuration ID or scan the QR from inside the Inthouse App on your device.
The Inthouse App checks for updates when it starts, or you can click Menu -> Check for updates in the App.
